Employee Management
Simplify Team Oversight with Robust Employee Management Tools
Manage Your Team Through the Employee Dashboard
Step 1 Access the Employee Dashboard
To access the employee dashboard, select the “Employee” option from the sidebar menu.
Employee Roles
Option 1 Create an Employee Role
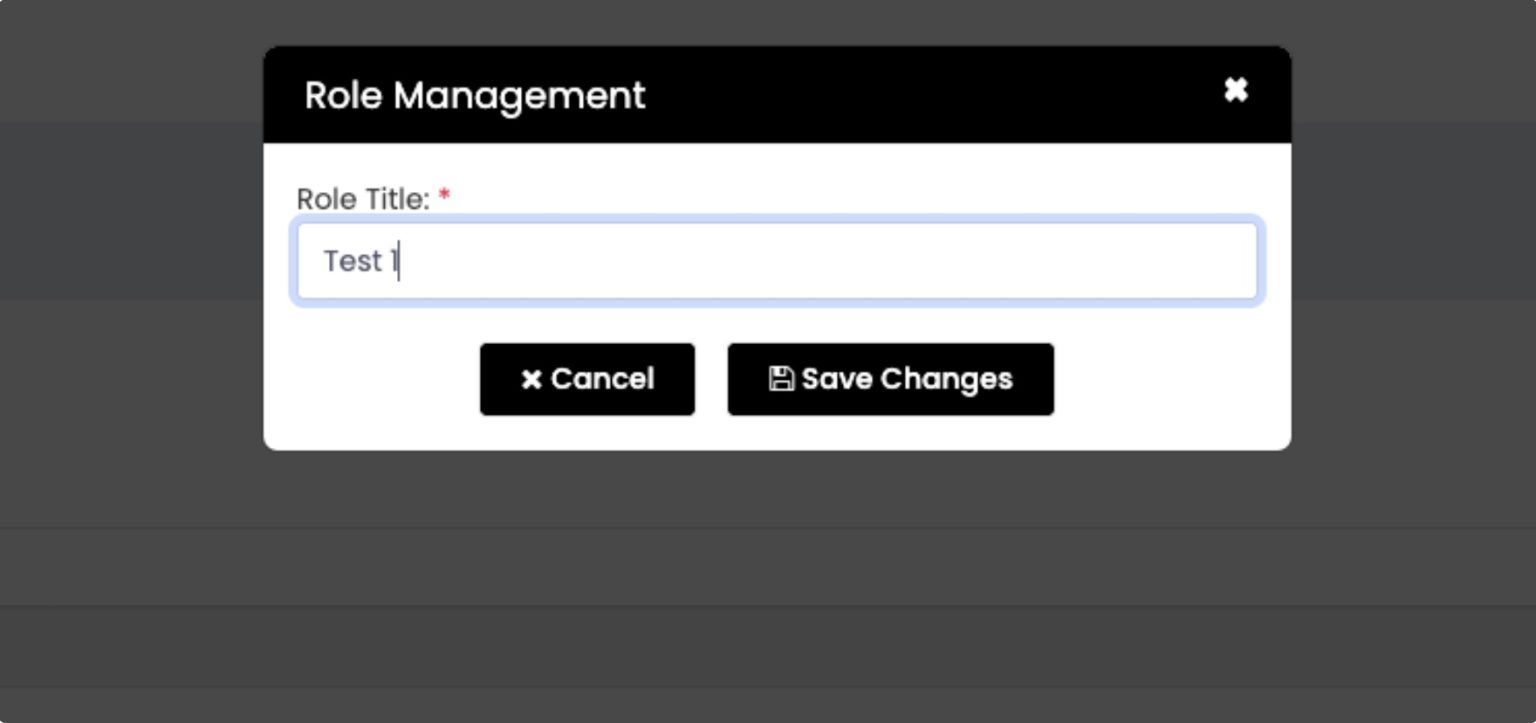
To create a role, select the “Create Roles” button in the top right.
You will receive a popup to enter the title of the new role, select the “Save Changes” button to submit your new role.
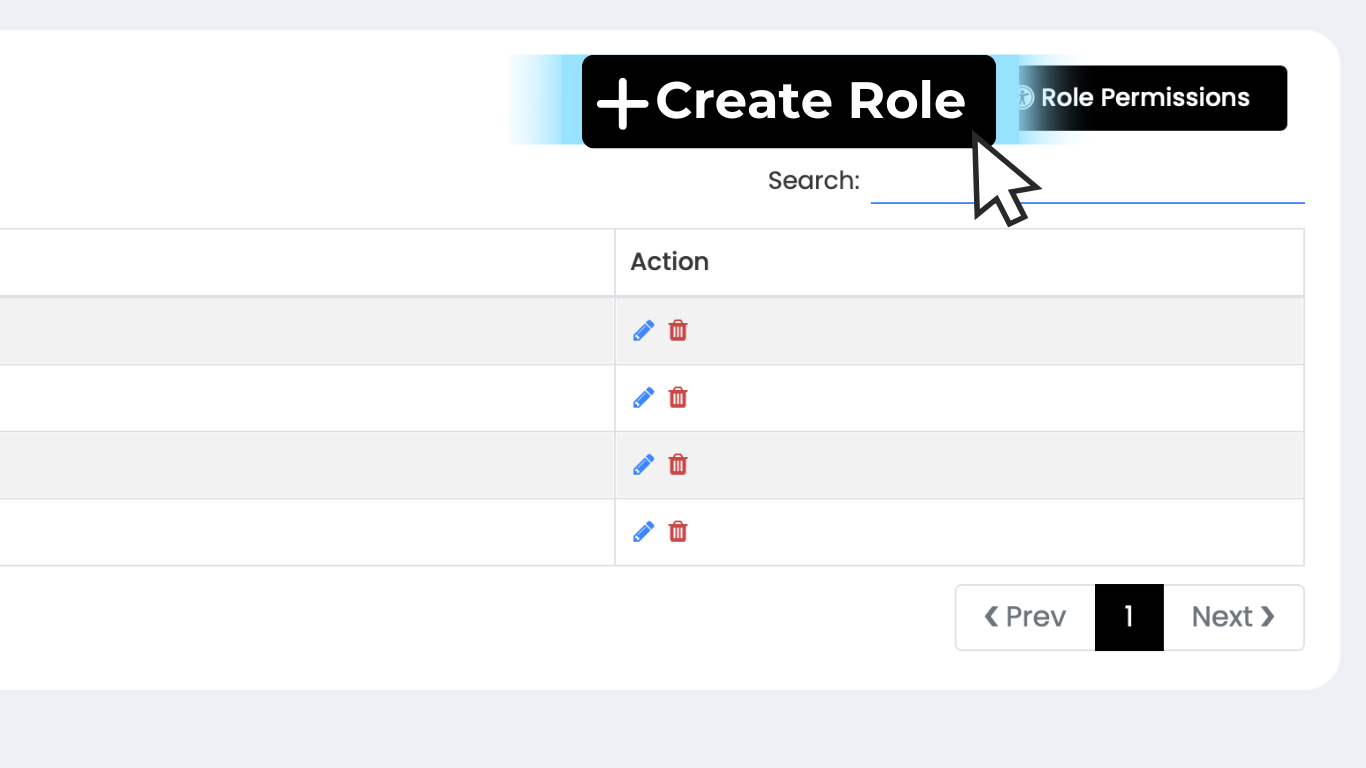
Option 2 Update Roles
To update a role, select the pencil icon under the actions tab next to the role you would like to set permissions for.
Option 3 Delete Roles
To delete a role, select the garbage can icon under the actions tab next to the role you would like to set permissions for.
Manage Role Permissions
Step 1 Access the Role Permissions Dashboard
To manage role permissions select the “Employees” option from the sidebar menu, then select “Permissions” in the dropdown.
Step 2 Enable/Disable Permissions
To enable permissions for a user role select the role for which you would like to edit permissions.
To enable a specific permission, make sure the checkbox next to the desired permission is selected. To disable a specific permission, ensure the checkbox next to the permission is NOT selected.
To save your changes to the permissions, select the “Update Permissions” button at the bottom of your screen.
Manage Users
Step 1 Access the Users Dashboard
To access the users dashboard, select the “Employees” option from the sidebar menu, then select the “Users” option from the dropdown.
Option 1 Add User
Step 1 Select "Add User"
To add a user, select the “Add User” button in the top right.
Step 2 Apply Role
You will be required to apply a role to the new user you’ve just created. To apply a role, click the white box labeled “Select Role” under the “Role” field. In the dropdown that appears, select the role you would like to apply to the new user.
Step 3 Enter Required Information
Next, you will need to enter the required information (such as name, email, password, etc.) for the user in the text boxes. Note: ensure that password meets the security criteria.
To complete creation of your new user, select the “Submit” button.
Option 2 User Forgot Password
If a user has forgotten their password, you can create a new password for them by selecting the key icon under the actions tab next to the user who’s password you would like to reset.
Option 3 Edit User
If you need to edit a user’s information, you can do so by finding the user you would like to edit and clicking the edit icon (a paper and pencil) under the actions tab.
Take Your Sky Systemz Experience Even Further
Discover more tools that enhance your payment processing and business management. Explore these guides to unlock the full potential of Sky Systemz.
Digit POS
Quickly process payments with our intuitive digital point-of-sale system, designed to simplify transactions for your business needs.
Web Reports
Access detailed reports to track sales, transaction history, and key metrics, empowering you to make informed decisions.
Invoicing
Streamline your billing process by creating, sending, merging, and managing professional invoices with just a few clicks.